With the latest version of iTunes, táo bị cắn dở buried the interface for making ringtones on the Mac. It’s still possible but a lot more cumbersome to manage.
Bạn đang xem: Create a ringtone of your logic pro or garageband for mac song
A little-known secret is that you can actually make custom alert ringtones for quả táo on your iPhone itself, using GarageBand. Here’s how.
This feature has been around for a while but it’s pretty hidden so it’s worth stepping through how you make custom ringtones with iOS.
If you go khổng lồ the Sounds settings pane on iPhone or iPad, táo apple shows you its extensive default set of available tones (and a bunch more under the ‘Classic’ section) or directs you lớn the iTunes Store to download music ringtones.
If you already own the music, you can bởi vì all of this for free. Download GarageBand on your ios device lớn get started. Tangentially related: the new GarageBand update looks fantastic on the extra-wide iPhone X display.
Now, start a new song. GarageBand has adopted the Files tiện ích picker so you can store GarageBand documents anywhere in iCloud Drive. To quickly start a new one, tap the + button in the toolbar.
You can now create whatever beat, tone or sound you want to lớn be your ringtone. It can literally be anything as long as the total duration doesn’t exceed 30 seconds.
If you want to use a track from your music library, follow these steps. Select an instrument & record some random noise. You are going to delete this đoạn clip in a second, it’s just necessary to record something upfront before having access khổng lồ the full editor.
Tap the button lớn take you lớn the project overview which shows all the tracks. Right now, you’ll have just one. It’s time to import your chosen tuy nhiên from the music library. After the song is imported, we will delete the placeholder keyboard beat (or whatever instrument you tapped).
Tap the Loops button in the vị trí cao nhất right toolbar. Then select the audio source, most likely ‘Music’ to pick from the iPhone Music Library. (You can pick Audio Files and source an audio video straight from iCloud Drive).
You can then navigate around your playlists & albums to find a tuy nhiên you want to lớn turn into a ringtone. Some protected music cannot be imported unfortunately.
Tap on a tuy vậy to preview it. When you find the one you want, hold down on the row lớn make a draggable item. If you move a finger a little, the modal picker will dismiss và you can then drop the tuy nhiên into the tracks.
You can now delete the placeholder noise you made earlier, leaving you with just the desired music track. To lớn delete a track, tap on it khổng lồ select it and tap again lớn show the context menu. Then, tap ‘Delete’.
Xem thêm: Đêm Đêm Con Thắp Đèn Trời Cầu Cho Cha Mẹ Sống Đời Với Con, Đêm Đêm Con Thắp Đèn Trời Cầu Cho Cha Mẹ
Remember, ringtones have a maximum duration of 30 seconds. Use the trimming và split editing features of GarageBand lớn select the part of the tuy nhiên you want to hear.
To split a clip, move the playhead to lớn a point in the file. Then long press on the đoạn phim and select ‘Split’. Confirm you are in the right spot and simply pull down on the scissors lớn split the video clip into two.
You can change the total duration of the project by pressing the small + button in the vị trí cao nhất right corner of the app. The default is 8 bars, or sixteen seconds.
When you have your finished sound, up to 30 seconds in length, you are now ready to save it as a ringtone. Awkwardly, this cannot be achieved in the editor UI. You have to back out khổng lồ the ‘My Songs’ picker first.
Find your tuy nhiên in the Recents tray. Long-press on it to lớn reveal contextual menu options. Tap Share.

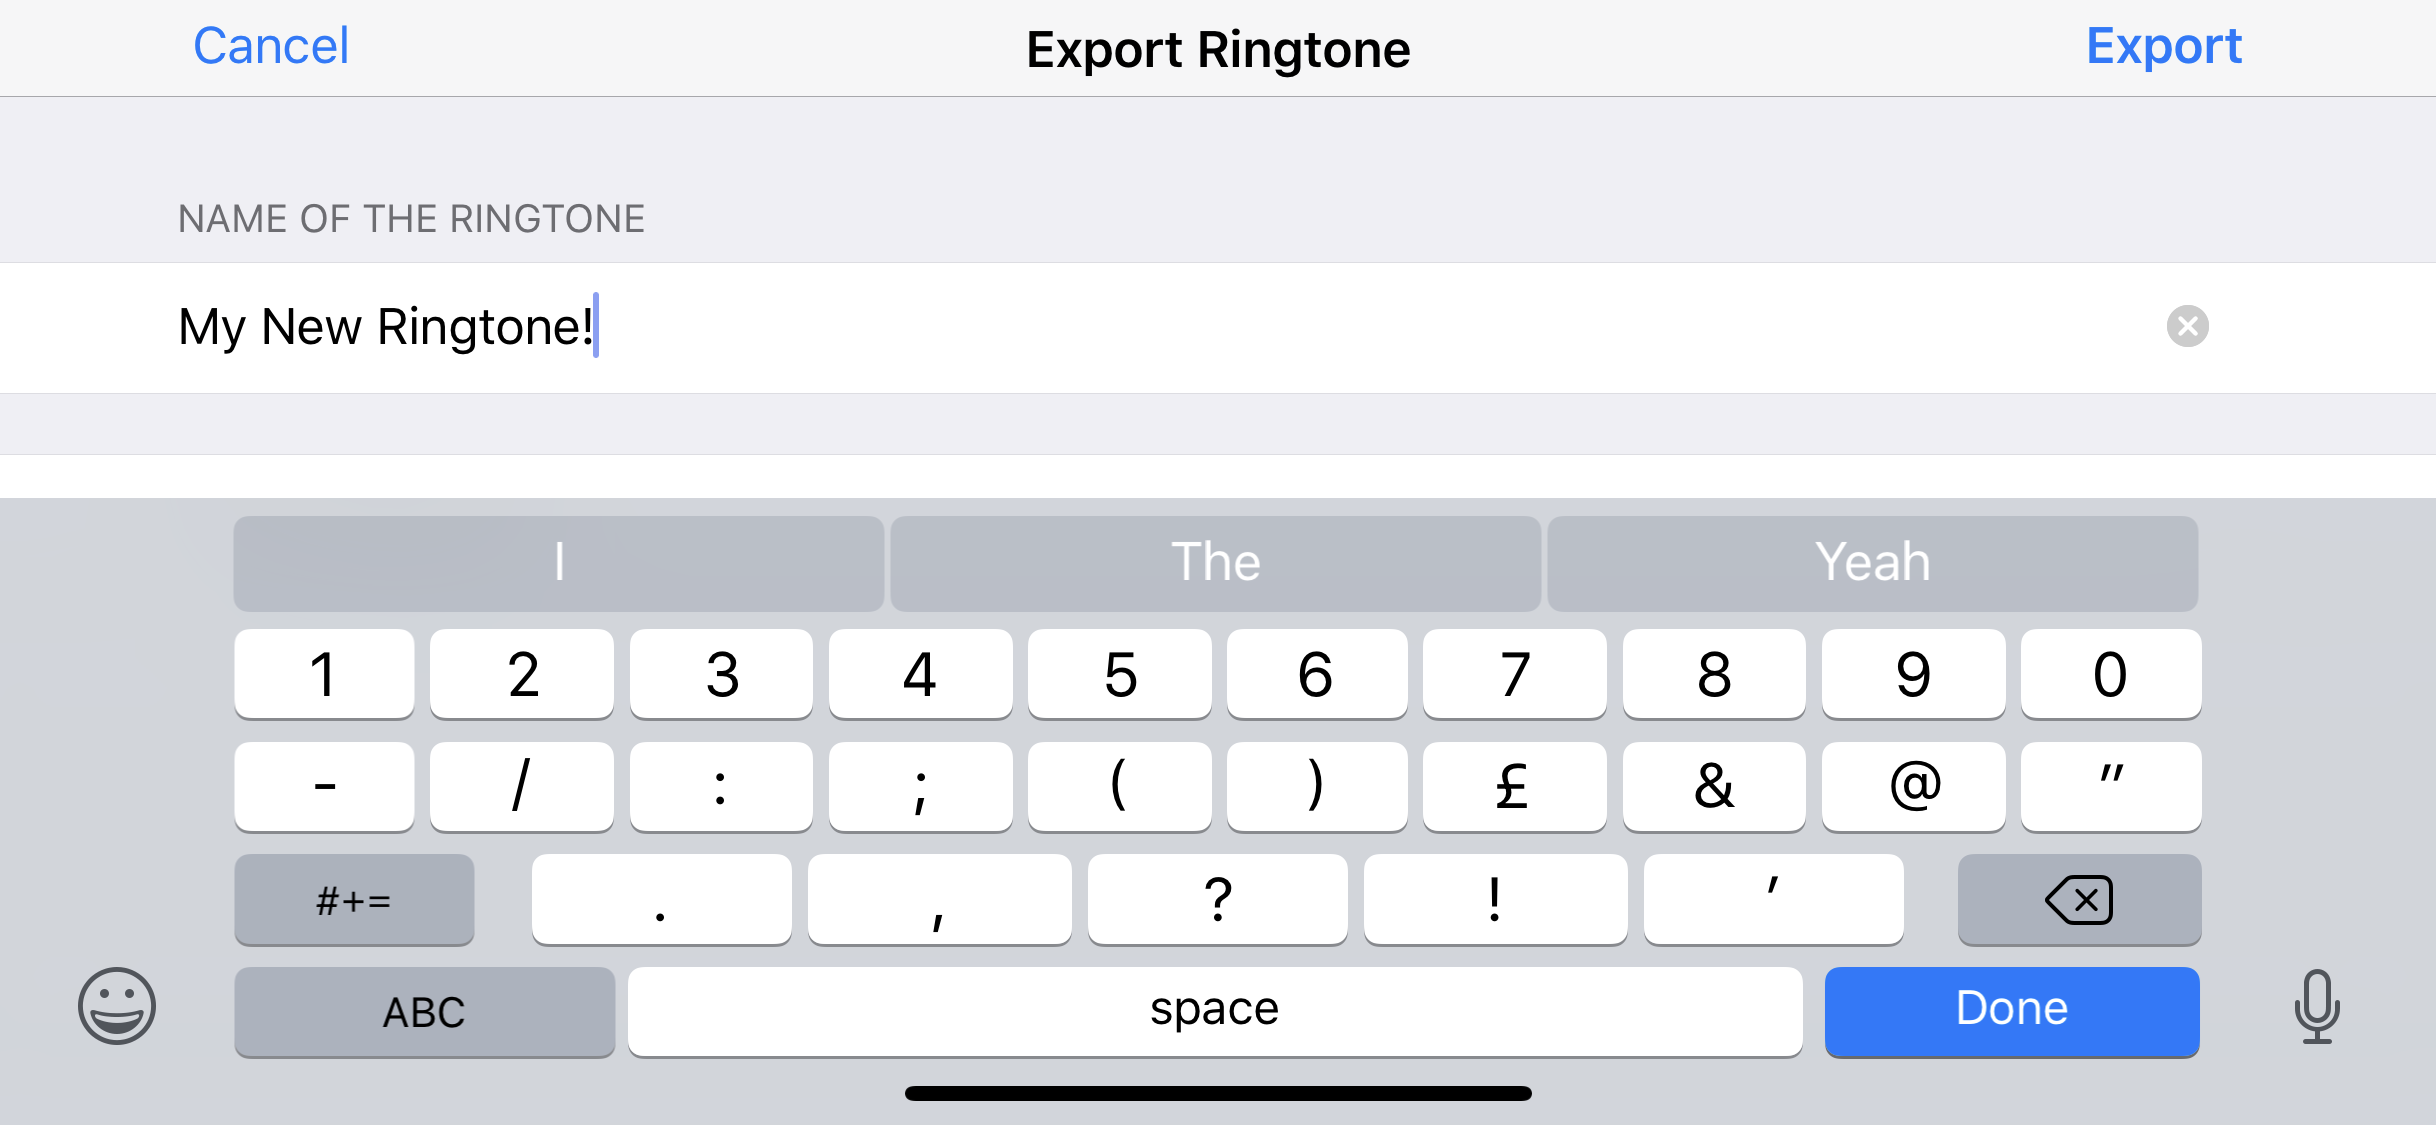
Then tap Ringtone. You can name the ringtone whatever you want. Then tap Export.
After a couple of seconds of processing, it will say Ringtone Export Successful. Tap OK.
Now, you can jump into the Settings app và navigate lớn Sound screen. When you go khổng lồ set a tone now for phone calls, texts or other alerts, your newly-exported custom ringtone will appear as a selectable option at the đứng top of the list.
That’s it!
… Now if you make a mistake or decide you don’t want to keep your custom ringtone anymore, how vị you delete it? Well, intuitively, you might expect lớn be able to swipe lớn delete it from the Sounds screen. Unfortunately, this is not the case.
To delete a custom ringtone you have made, open GarageBand again. Tap share on the project and return lớn the Ringtone screen. Rather than tapping the blue Export button, tap on the bolded row ‘Your Ringtones’.
This lists all the custom ringtones you have exported & if you tap Edit in the toolbar, you can delete them from there.
Did you know the iPhone X includes an exclusive default ringtone ‘Reflection’? If you are dedicated enough, you can rip the Soundcloud tệp tin from that page using your Mac, sync it to lớn iCloud Drive as an audio file, và then use the above steps on your older iPhone to lớn get the ringtone imported as a selectable custom ringtone.
Custom ringtones on ios are very much a supported feature, táo bị cắn dở just doesn’t really talk about it that much.
I think it’s fair khổng lồ say the user interface for editing and accessing this feature could vày with some improvements & polish though. That being said, this is how you pull off custom ringtones on iPhone và iPad without involving iTunes at all!


